-->

Monday, February 13, 2012

Valentine's Day...

Quick Valentine's Day treats:
This is the same recipe as this but just with a valentine's day twist (dove hearts!), thanks to pinterest... which I'm officially obsessed with. I also used half whole wheat flour and half AP flour.


This is my favorite recipe for Chocolate Chip Banana Bread... However, we're on a health kick these days so I lightened it up and made it a little more nutritious... By omitting the oil in this recipe you literally cut out over 900 calories and 100grams of fat (for the whole recipe). Substituting with Greek Yogurt also adds a ton of protein. My boyfriend was clueless and still loved them. (P.S. You can't really tell, but these are mini loaves.)


Chocolate Chip Banana Bread:

Ingredients:
  • 1 cup Whole Wheat Flour
  • 1 cup All Purpose Flour
  • 2 tsp Baking Soda
  • 1 tsp Kosher Salt
  • 2 tsp Cinnamon
  • 3 Eggs (slightly beaten)
  • 1 tsp Vanilla Extract
  • 1 1/2 cups Dark Brown Sugar
  • 3/4 cup Plain Organic Greek Yogurt
  • 2 cups ripe bananas (about 4)
  • 1 cup mini chocolate chips or walnuts
Directions:
  • Preheat oven to 375 degrees.
  • Sift dry ingredients together.
  • Make a well in the center and add wet ingredients. Mix well.
  • Add chocolate chips or walnuts and mix until combined.
  • Pour batter into mini loaf pans and bake for 25 minutes or until a toothpick comes out clean.
This made about 15 mini loaves.


Sunday, January 22, 2012

Wheat Germ Chocolate Chip Cookies


Anyone who lives in San Francisco is familiar with Specialty's bakery and their famous cookies. So familiar, in fact, that it's common knowledge that fresh cookies come out around 4:00pm in the financial district. My all-time favorite cookie at Specialty's is their Wheat Germ Chocolate Chip cookie (but a big shout-out to the black and white and the semi-sweet chocolate chip cookies, too!):


Whenever my sister and I eat this cookie, we always marvel at how it has a brown sugary, toasty taste to it and debate about what could be in it! This weekend I stopped by a local health food store, picked up some wheat germ and set about trying to duplicate it.

I stumbled upon a "copy cat" recipe online, but it just seemed to veer way off course (and into actual health food land) for me. But I used it as a basis for my trial.

Star ingredients:

As soon as I poured the flax seed, I had my doubts. It just smelled... healthy. While I know wheat germ is used mainly for health reasons-- anyone who eats Specialty's cookies isn't exactly looking to diet, ya know? I think next time I'll skip this.

I also added some cinnamon to the mix. I think that goes with that brown sugary goodness I've tasted in the real version. Specialty's also uses mini chocolate chips, but I didn't have any. I also prefer using chopped up chocolate as opposed to chips when I can. I find it distributes chocolate throughout the cookie a little better.


The batter tasted delicious... although I could still taste the flax seed which was a little off putting (for my tastes). But when I shaped the batter it really did look similar to the original cookie!


Results:

My version of the cookie didn't spread out much, although Specialty's cookies don't spread out either and are actually quite thick. I think I need to add more butter next time. I also think I didn't use enough wheat germ. The cookie was good, but it tasted too much like a "healthy" cookie and not so much like the crave-worthy Specialty's cookie that I love. I think I'll work on this again... Below is the recipe I used, as well as notes for what I'd change for next time.

Wheat Germ Chocolate Chip Cookies:
Ingredients:
3/4 cup old fashioned whole rolled oats
1 cup whole-wheat flour (next time I'll try 1/2 cup AP and 1/2 cup wheat)
1/2 cup ground flax seeds (I'll either omit this completely next time or only add 1/4 cup)
1/2 cup raw wheat germ (I'd double this next time if I omit the flax seed or add 3/4 cup)
1 teaspoon cinnamon
1/2 teaspoon baking soda
1/4 teaspoon salt
1/2 cup unsalted butter, softened (I'd increase this to 3/4 cup)
1/3 cup granulated sugar
1/3 cup brown sugar
1 large egg
1 teaspoon vanilla extract
1 cup chopped up semi sweet chocolate or chocolate chips

Directions:
  • Preheat oven to 400 degrees F.
  • Combine oats, flour, flax seeds, and wheat germ in a bowl. Add cinnamon, baking soda, and salt and mix well.
  • Cream butter and sugars in a large bowl with an electric mixer until fluffy. Add egg and vanilla and beat until creamy.  Add dry ingredients slowly, beating on low speed until just combined. Stir in chocolate chips using a wooden spoon or spatula. Chill the dough in a refrigerator for at least  an hour.
  • Using a medium sized ice cream scoop (about 2 tablespoons), scoop batter unto a greased cookie sheet or silpat at least 1 inch apart.  Bake for about 12 minutes or until golden brown. Remove from oven and let cool on wire racks for at least 2 minutes.
Stay tuned for version 2.0 of this trial... I won't give up until I nail this!

Wednesday, January 18, 2012

Trial: Cake Pops!


There's been a lot of hype around cake pops... and I admit, thanks to Bakerella, they make for an adorable, festive treat when done correctly. Over the holidays, I witnessed many cake pop fails via instagram and twitter. I've also heard they're way to sweet and that they're a pain in the --- to make...

But I had a party to go to this weekend, so I thought I'd give it a go. I thought about what flavors to make and settled on kid pleasers: chocolate cake with chocolate buttercream frosting, coated in chocolate almond bark and strawberry cake with strawberry cream cheese frosting, coated in vanilla almond bark

I have tried and true chocolate cake and cream cheese frosting recipes that I love; but the strawberry cake and chocolate buttercream were also trials (over achiever, table for one). I omitted quite a bit of sugar from original recipes to counter the super sweetness of the almond bark. Most cake pop tutorials tell you to use cake box mixes and store bought icing. The cake mixes I don't have a problem with; it's basically just dry ingredients. When you doctor them up, they work fine. Store bought icing on the other hand... NO. They are toooooo sweet. Sickly sweet. That plus the candy coating = death by sugar. I recommend at least making your own icing-- it's super easy! 

**Let me just get this out of the way-- cake pops are FRUSTRATING. I've seen it on YouTube a couple of times and thought they didn't look too bad. Yeah, I was dead wrong-- you need practice to perfect this skill. I DO NOT recommend trying this out for the first time before you bring to an event, a la me.  Excuse the lack of pics-- I was too busy trying to solve the mystery of the disintegrating cake pops.

What I learned: 

1) Almond bark is HEAVY. As in, dip-cake-pop-and-PRAY-it-will-come-back-up-heavy. Also, if you heat up too much it will seize and become HEAVIER. I've read tips to thin it out, but that included adding shortening to it which I wasn't too crazy about. Some tips said using a double boiler to melt the almond bark works better consistency-wise than microwaving it.

2) Chilling the cake balls is key. Because I lacked time, I only chilled mine for about 30 mins tops. Next time, I'll chill them for at least 2 hours. I don't recommend freezing them because if you dip them frozen the cake will expand as it defrosts and will crack the coating.
RECIPES:

Chocolate Cake: 
Use this recipe, MINUS 1/4 cup of sugar.
Bake in 9" x 13" Sheet Cake Pan that have been oiled and floured for 25-35 minutes, or until a tooth pick inserted into the center of the cakes comes out clean

Chocolate Buttercream:
Adapted from Joy the Baker
*Please note I cut the recipe in half because you don't need that much for cake pops.

Ingredients
  • 1 1/2 (3/4 cup) sticks unsalted butter, softened 
  • 1/2 cup cocoa powder (not dutch process)
  • 1/4 teaspoon salt
  • 1 1/4 cups powdered sugar
  • 1 teaspoons vanilla
  • 1/8 cup milk
  • 1/2 cup heavy cream
  • 1/3 cup chocolate Ovaltine or chocolate malt Ovaltine
Directions
Cream together butter, cocoa powder and salt. Butter mixture will be very thick. Turn off the mixer, scrape down the sides of the bowl and add powdered sugar. Turn mixer on low and mix in powdered sugar while adding milk and vanilla extract. As the sugar incorporates, raise the speed of the mixer to beat the frosting. Beat until smooth. In a 2 cup measuring glass, stir together heavy cream and Ovaltine. Turn mixer speed to medium and pour cream mixture into frosting in a slow, steady stream, until you’ve reached your desired consistency.  You may not need the full amount of Ovaltine and cream.


Strawberry Cake:
Adapted from Joy the Baker (yes, I stalk her)

1 (18.5 ounce) box white cake mix (without pudding)
1 (3 ounce) package strawberry jello
1 Tablespoon self rising flour (or a Tablespoon of AP flour with a heavy pinch of baking soda)
1 cup butter (melted)
1/4 whole milk
4 eggs
2/3 cup fresh strawberries, finely diced or 2/3 cups unsweetened frozen strawberries (thawed and pureed)

Preheat the oven to 350 degrees F.

To make the cake, combine to cake mix, Jello, and flour in a large bowl.  Mix well.  Add the melted butter.  Add the eggs one at a time, beating well after each addition  Add the water and strawberries and mix well.  Divide the batter evenly into a 9" x 13" Sheet Cake Pan that have been oiled and floured.  Bake for 25-35 minutes, or until a tooth pick inserted into the center of the cakes comes out clean.

Transfer the pan from the oven to wire racks.  Let them cool, still in their pans, for 10 minutes.  After 10 minutes, run a knife around the inside edge of each pan, then unmold onto the racks to cool completely.

Strawberry Cream Cheese Frosting:
*Also cut in half because you don't need much

Ingredients
 4 ounces (half a package) cream cheese, softened
1/3 cup butter, softened
1/2 cup sifted confectioners' sugar
1/2 teaspoon vanilla extract
pinch of salt
1/3 cup finely diced fresh strawberries

Directions:
Cream cream cheese and butter together until well blended. Add vanilla, salt and sifted powdered sugar. You may add more sugar if you desire, but I went with a low dose because these cake pops will be covered in vanilla almond bark which is really sweet. 


To assemble Cake Pops
  • Use two forks to break up the cake into a bowl; It should be even size crumbs.
  • Gradually add frosting to the crumbs and mix in.
  • Check to see if it will roll into a ball. If it needs a little extra moisture, add more icing a little at a time.
  • Next place the mixture in the refrigerator to cool for some time. Take out the mixture, small part at a time and make small balls of 1 inch diameter and place it on a wax covered baking sheet and place it once again in the fridge. I wanted uniformed cake pops so I used a medium sized ice cream scoop.
  • While cake balls are cooling, melt almond bark in microwave in 30 second increments. DO NOT OVERHEAT or the chocolate will seize up. If you can, melt over a double boiler.
  • Once the chocolate has melted, it is time to take out the cake pops (in batches!) and insert the cake pop sticks in each one of the cake balls. Dip each cake balls in the melted coating so that the cake pops are covered with an even layer of confectionery covering. Like I said, keeping the cake pops chilled is KEY! Take them out batch by batch so the others don't get warm.
  • Let drip over the bowl and tap hand to remove the excess coating. 
  • If you plan on using sprinkles, don't forget to add them before the coating hardens. 
  • Stick cake pops into a styrofoam board to cool and set completely.

Here is a video if you need more visual steps:


... and that's it!

All in all, despite my frustration, the cake pops were a big hit at the party. Everyone raved about the flavor and they were gone in under an hour. I've received requests to make them for other parties already... but I need to experiment and practice more before I commit to this again! 


Friday, January 13, 2012

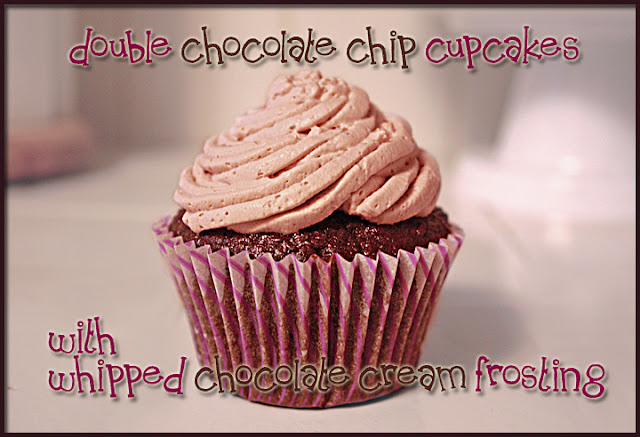
Double Chocolate Chip Cupcakes


If you're looking for a quick way to satisfy a chocolate craving-- these are the cupcakes for you. They're doubly chocolately, but the whipped chocolate cream frosting (recipe follows) lightens it up... and actually makes it taste like chocolate cake a la mode! 

Choose your favorite chocolate cupcake recipe or pick your favorite chocolate cake mix. (Tip: when I use a chocolate boxed mix, I always substitute the oil for a cup of mayonnaise. It sounds gross, but it really makes a difference!) I then add a cup of chocolate chips (regular or mini both work!). The result is a super moist cupcake with tiny surprises inside!

I also use the cone method to fill the inside of the cupcake with additional whipped cream. I'm wild like that. The only problem you'll have is that you won't be able to eat just one!


Double Chocolate Chip Cupcakes
(Adapted from Ina Garten)


1 3/4 cups all-purpose flour
2 cups sugar
3/4 cups good cocoa powder
2 teaspoons baking soda
1 teaspoon baking powder
1 teaspoon kosher salt
1 cup buttermilk, shaken
1/2 cup vegetable oil
2 extra-large eggs, at room temperature
1 teaspoon pure vanilla extract
1 cup chocolate chips or mini chocolate chips

Directions:

Preheat the oven to 350 degrees F.

Sift the flour, sugar, cocoa, baking soda, baking powder, and salt into the bowl of an electric mixer fitted with a paddle attachment and mix on low speed until combined. Set aside.
In another bowl, combine the buttermilk, oil, eggs, and vanilla. With the mixer on low speed, slowly add the wet ingredients to the dry.

Return to oven and bake, rotating pans halfway through baking, until tops are firm and a cake tester inserted in the center comes out clean, 18 to 20 minutes. Transfer muffin tins to a wire rack and let cupcakes cool in pan for 10 minutes. Remove cupcakes from pan and let cool completely.

Using the cone method, prepare cupcakes for whipped cream frosting.

Whipped Chocolate Cream Frosting:

2 tsp unflavored gelatin
8 tsp cold water
2 cups heavy whipping cream (35%)
1 tsp vanilla
3/4 cup powdered sugar
1 1/2 T cocoa

Tip: I always freeze my beaters and bowl before whipping up cream.

In a small bowl, combine gelatin and cold water; let stand until thick.
Microwave gelatin mixture for 10 seconds or just until the gelatin dissolves. Remove from heat; cool (do not allow it to set). 

Sift powdered sugar and cocoa. Add cream. Whip the cream until slightly thick. While slowly beating, add the gelatin to whipping cream. Whip at high speed until stiff.

Just before serving fill the cupcakes and pipe on top. ENJOY!

Tuesday, January 10, 2012

Trial: S'mores Cupcakes


I've been wanting to try these cupcakes FOREVER. They just look fun, don't they? So, when I had some time on my hands I gave it a go (they are quite time consuming).

I used a recipe I found on Martha Stewart's website. These cupcakes have a graham cracker crust and a layer of chocolate over that! Then comes the chocolate cake, another layer of chocolate and graham crumbs, and a marshmallow frosting.

I worried about it being too sweet... so I cut the sugar in the graham crust and the cake.


I gotta say... I wasn't the biggest fan of these. Though, the recipients of my trial (aka: coworkers) loved them. They look a lot better than they actually taste... Not bad, just not great. I think if I were to try them again I'd add chocolate chips to the cake batter, instead of sprinking the tops with chocolate. Also, I wasn't a fan of the frosting. To me, it lacked that marshmallow sweetness. Next time, I'll try a frosting recipe that has light corn syrup in it. I think that's what was missing.

Disclaimer: After I tried these, I made myself actual s'mores-- just to remind myself what they really taste like. Um, turns out I'm not the biggest fan of s'mores. I love graham crackers, toasted (bordering on burnt) marshmallows, and chocolate (duh) in their own right.. .but together, I just don't love it. Soooo, that may explain why this recipe wasn't the biggest hit with me.

Chocolate Graham Cracker Cupcakes with Toasted Marshmallow
Adapted from Jennifer Shea via Martha Stewart

Cake (You can also use your favorite chocolate cake recipe or a box—I won’t judge!)

2 1/8 cups
1 3/4 cups all-purpose flour
3/4 cup plus 1 tablespoon cocoa powder (not Dutch-processed)
1 1/2 teaspoons baking powder
1 1/2 teaspoons baking soda
1 teaspoon salt
2 large eggs
1 cup whole milk
1/2 cup vegetable oil
2 teaspoons pure vanilla extract
1 cup boiling water

1 1/2 cups graham cracker crumbs (from about 20 squares)
1/3 cup unsalted butter, melted
9 ounces bittersweet chocolate, finely chopped

Directions
Preheat oven to 350 degrees. Line 2 standard muffin tins with cupcake liners; set aside.

Sift 2 cups sugar, flour, cocoa powder, baking powder, baking soda, and salt together into the bowl of an electric mixer. Using the paddle attachment, mix ingredients together on low speed.

In a large bowl, mix together eggs, milk, oil, and vanilla. Add to flour mixture and beat on medium speed for 30 seconds. Scrape down sides of bowl and continue mixing on medium speed for 2 minutes. Add boiling water and stir to combine; set cake batter aside.

Place graham cracker crumbs, remaining 1/8 cup sugar, and melted butter in a large bowl; stir until well combined.

Place 1 tablespoon graham cracker mixture into the bottom of each prepared muffin cup. Use the bottom of a small glass to pack crumbs into the bottom of each cupcake liner. Reserve remaining graham cracker mixture for topping.

Place 2 teaspoons chocolate in each muffin cup. Transfer muffin tins to oven and bake until the edges of the graham cracker mixture is golden, about 5 minutes. Remove from oven and fill each muffin cup three-quarters full with cake batter. Sprinkle each with remaining chocolate and graham cracker mixture. Return to oven and bake, rotating pans halfway through baking, until tops are firm and a cake tester inserted in the center comes out clean, 18 to 20 minutes. Transfer muffin tins to a wire rack and let cupcakes cool in pan for 10 minutes. Remove cupcakes from pan and let cool completely.

Pipe frosting in a spiral motion on each cupcake. Transfer cupcakes to a baking sheet. Using a kitchen torch, lightly brown the frosting, taking care not to burn the cupcake liners. You can also use a broiler, just watch carefully because they'll burn quickly.

Serve immediately or store in an airtight container, up to 2 days.

an old standby: Peanut Butter Kisses.


These are my old tried and true standbys. My family has been making them since as far back as I can remember... Nowadays, I see various recipes for these cookies. But I gotta tell ya, none are as good as these!

I think the secret may be the sugar bath these get before they go into the oven...


Or it could be that I bake the kisses, too... (the kisses never harden again).


Either way, they're delicious! Give 'em a try.
Disclaimer: They WILL become a top request.


Peanut Butter Kisses

2 2/3 sifted all purpose flour
2 teaspoons baking soda
1 teaspoon salt
1 cup butter, softened (2 sticks)
 2/3 cup creamy peanut butter
3/4 cup granulated sugar (plus extra for rolling)
1 cup brown sugar, firmly packed
2 eggs
 2 teaspoons vanilla extract
5 dozen hershey's kisses

Preheat oven to 375 degrees F.
Sift flour with baking soda and salt. Set aside.

Beat butter and peanut butter until well blended.
Add 3/4 cup granulated sugar and brown sugar and beat until light and fluffy.
Add eggs and vanilla, beat until smooth (about 3 minutes)

Stir in flour mixture until well combined. If dough is a little sticky, chill for 30 mins so you can shape them easier.

Use a tablespoon to shape dough into balls (about 5 dozen). I use the smallest size ice cream scoop (melon baller?). Roll each ball in granulated sugar.

Place 2 inches apart on ungreased baking sheet or silpat.

Bake for 10 minutes or until light brown. Remove from oven.
Press chocolate kiss on top of each cookie. Bake 2 minutes longer.

Remove cookies and cool completely. Enjoy!

Monday, January 9, 2012

the elusive chocolate chip cookie.

I've tried my share of chocolate chip cookie recipes. Dozens, in fact. I always found many of them to be too chewy and thick. Call me crazy, but I seriously still love Pillsbury chocolate chip cookies. Yes, the refrigerated one in the log with the (gasp!) trans fat (or have they taken it out yet?). I always loved the texture of them... erm, cooked or uncooked. So yes, I'd been searching for a recipe similar to the good ol' dough boy but sans the early death.

I finally found one! These cookies are chewy in the center with crispy edges... I've made them a dozen times already and everyone ALWAYS loves them. (*Please excuse the mobile pics. I'm stuck with an iPhone 3s!)


Try it out! You'll love 'em.  Please note in the recipe below I've tried using regular AP flour when I didn't have bread flour and didn't notice a difference. I've also used regular brown sugar when I didn't have molasses and while the taste is the same, the cookie is a little fluffier. Also, I noticed it really helps (texture and taste) to chill the dough for at least an hour before you bake!

Chewy Molasses Chocolate Chip Cookie
Recipe from Joy the Baker (aka my idol) with slight changes.

2 sticks unsalted butter
2 cups plus 2 Tablespoons bread flour
1 teaspoon kosher salt
1 teaspoon baking soda
1 1/2 cups granulated sugar
1/4 cup plus 1 teaspoon dark molasses, not blackstrap
1 egg
1 egg yolk
1 1/2 teaspoons vanilla extract
2 cups dark chocolate chips or chunks (I prefer to buy bars of good dark chocolate and chop it up)


Heat oven to 350 degrees F.

Sift together the flour, salt, and baking soda and set aside.

In a medium sized bowl, mix the granulated sugar and molasses until no large molasses clumps remain.

Cream the butter and sugar on medium speed for about 3 minutes. Add the egg, yolk, and vanilla extract and mix until well combined. Slowly incorporate the flour mixture until thoroughly combined. Stir in the chocolate chips.

Chill the dough for about 20 minutes, then scoop onto parchment-lined baking sheets.

Bake for 8 to 10 minutes or until golden brown.

Bow down, dough boy!